How to revoke a malicious SSL certificate
Today I received an email from clouflare that one of my domains had an unauthorized SSL certificate created for it. I've never been an expert regarding this area of the web and this is the first time I have ever experienced this. After some quick research I learned I can manually revoke these unauthorized certificates myself. It took about 3 hours to figure it all out but I got it done. This post is a quick tutorial on how I had to go about doing this. This is mainly a reference for myself so I don't have to waste as much time if this happens again.
I'm on a windows machine so these steps may not apply to everyone.
Tools required
Steps
Step 1: Install openssl for windows
Download and run the windows installer for openssl. Once installed you will have to add openssl to your systems path.
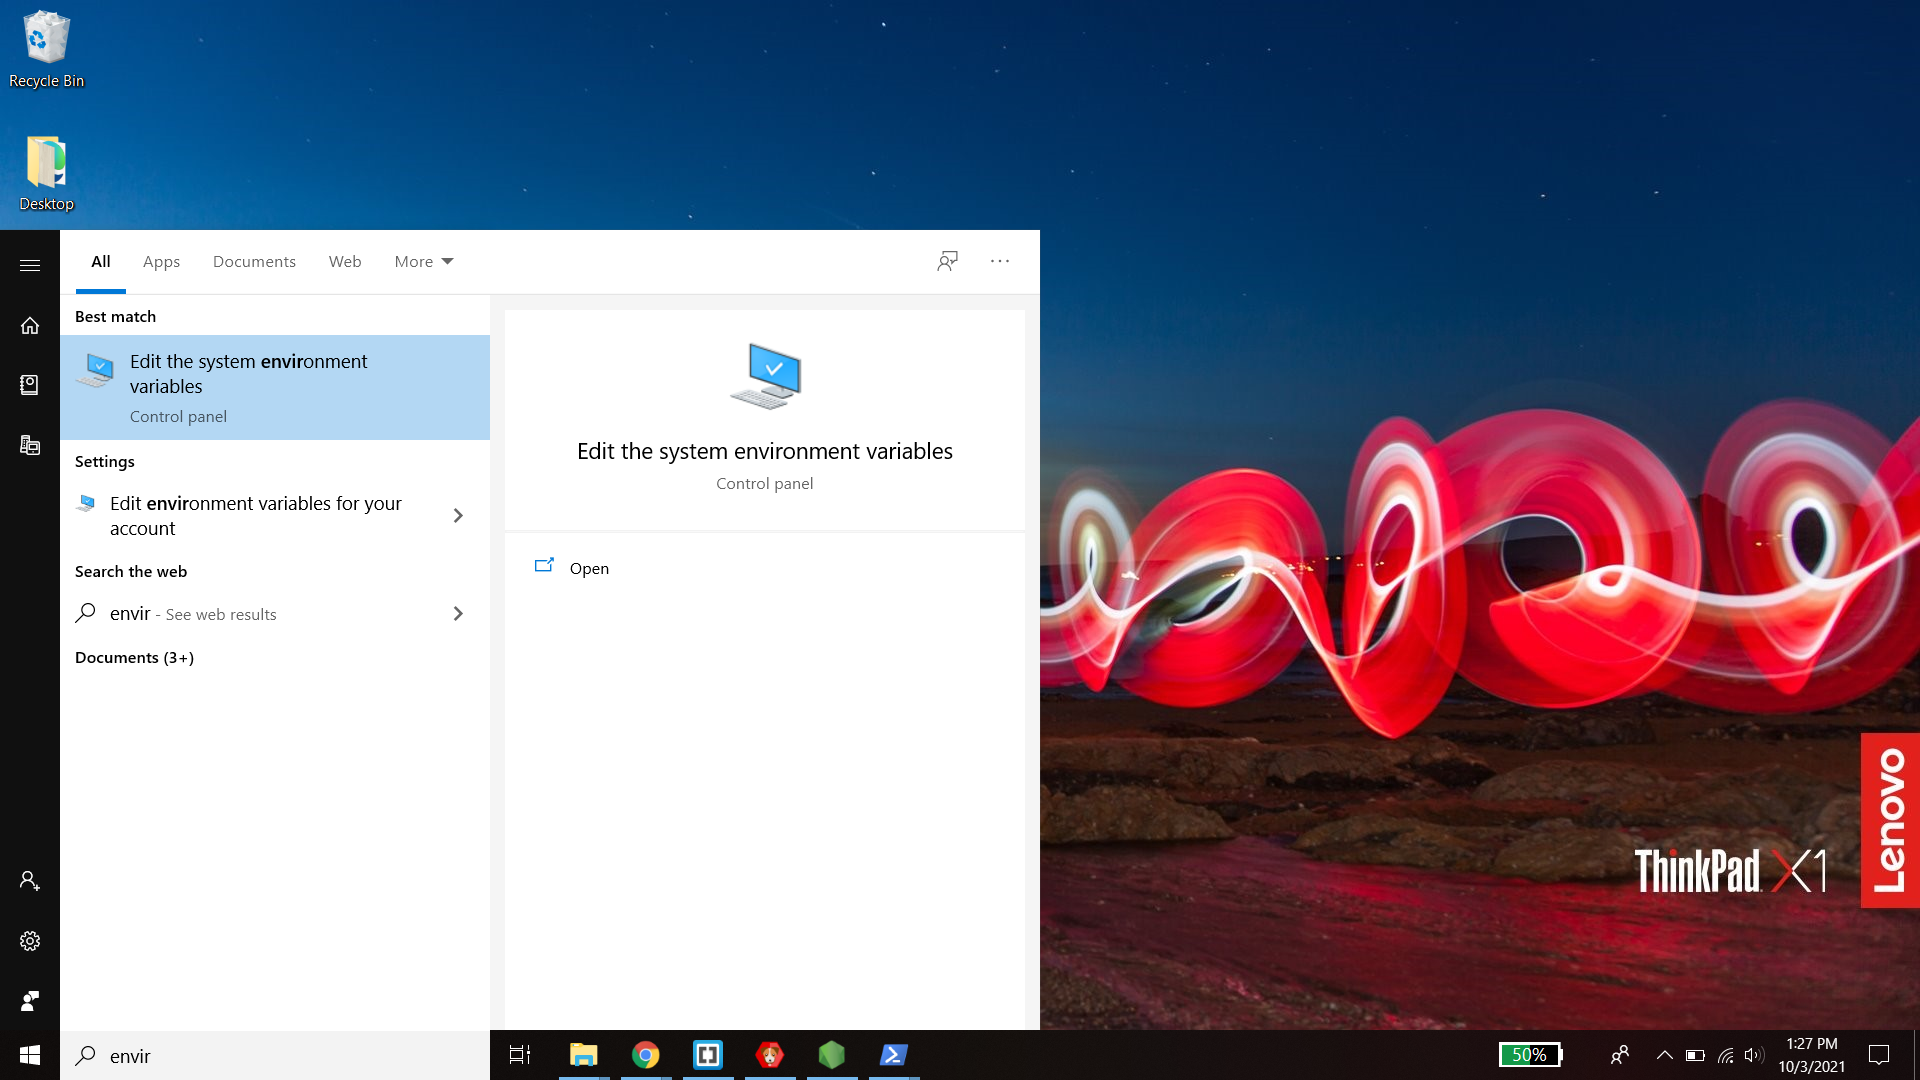
- Go to your start menu and type "environment variables". Click "Edit the system environment variables".
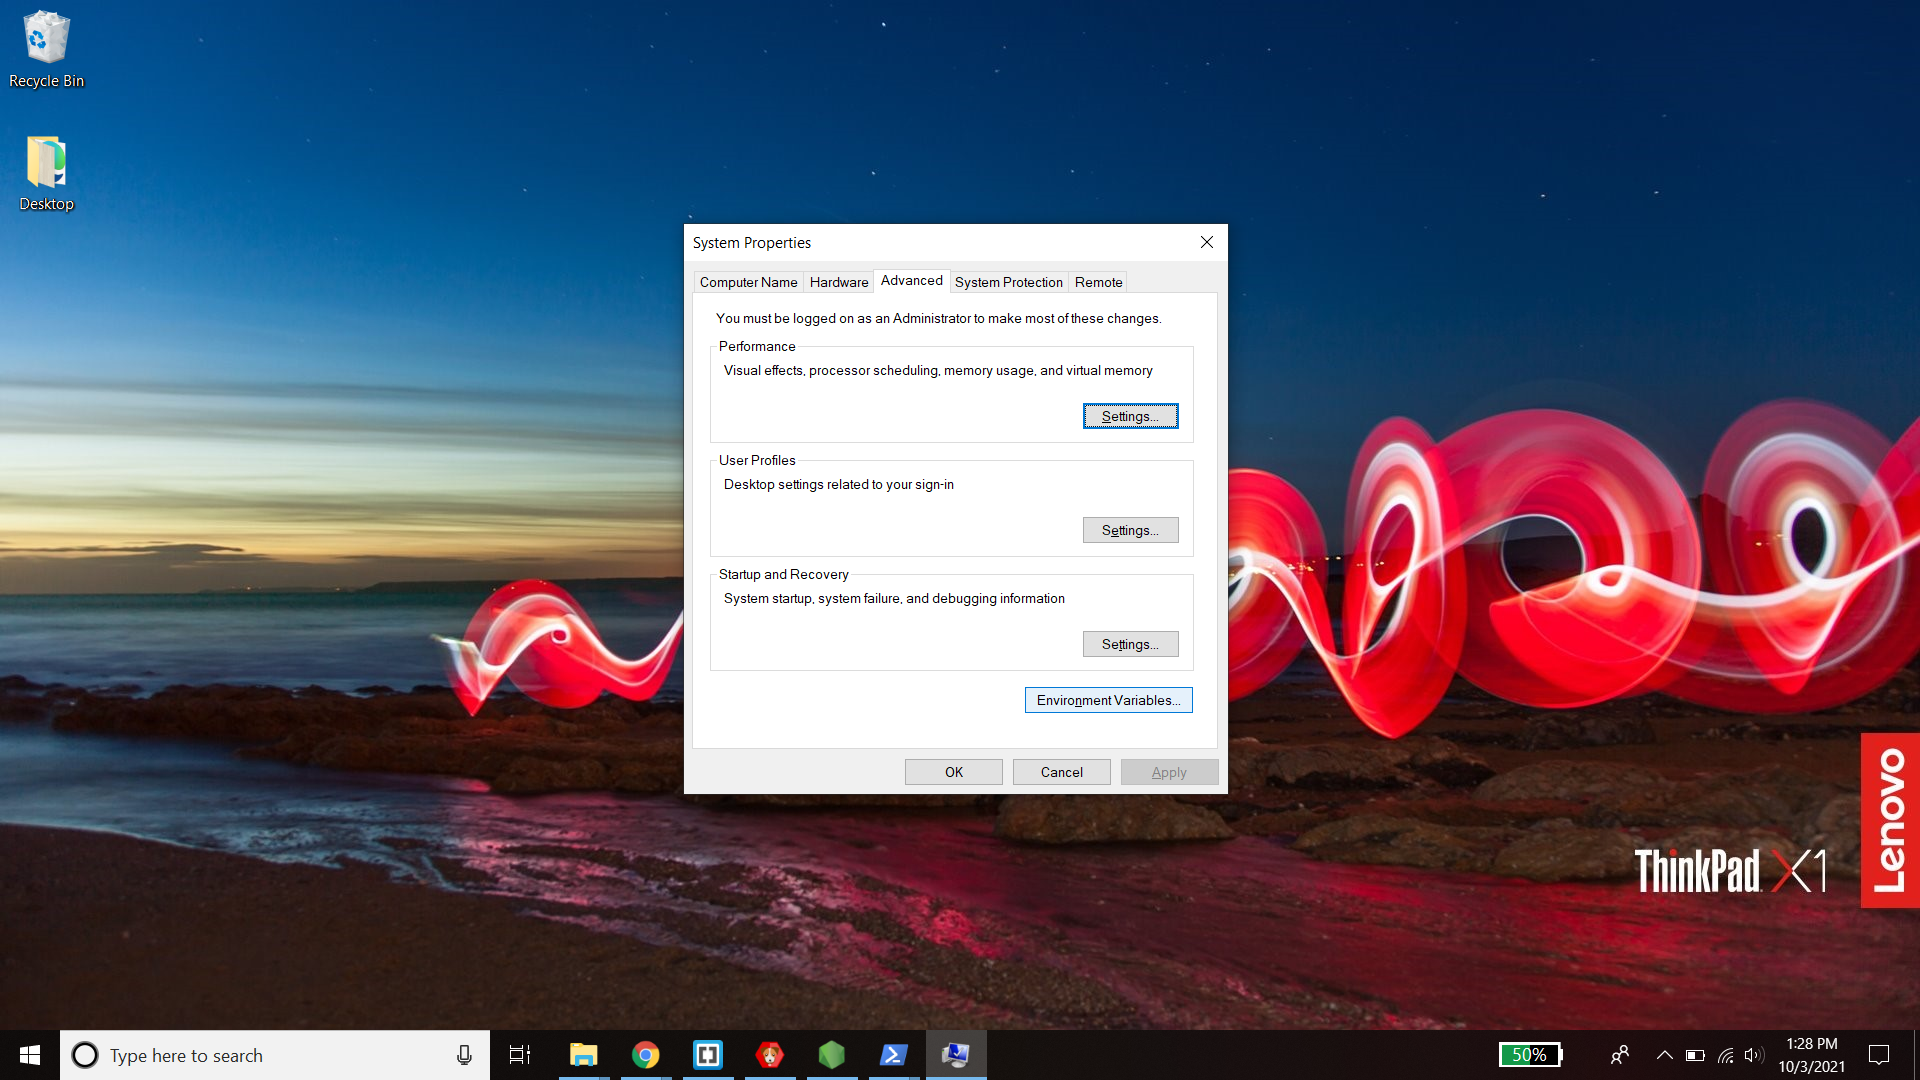
- In the window that opens, select the "advanced" tab and click the "Environment Variables" button at the bottom right
- From the bottom "System Variables" section, select the "Path" variable and click "Edit".
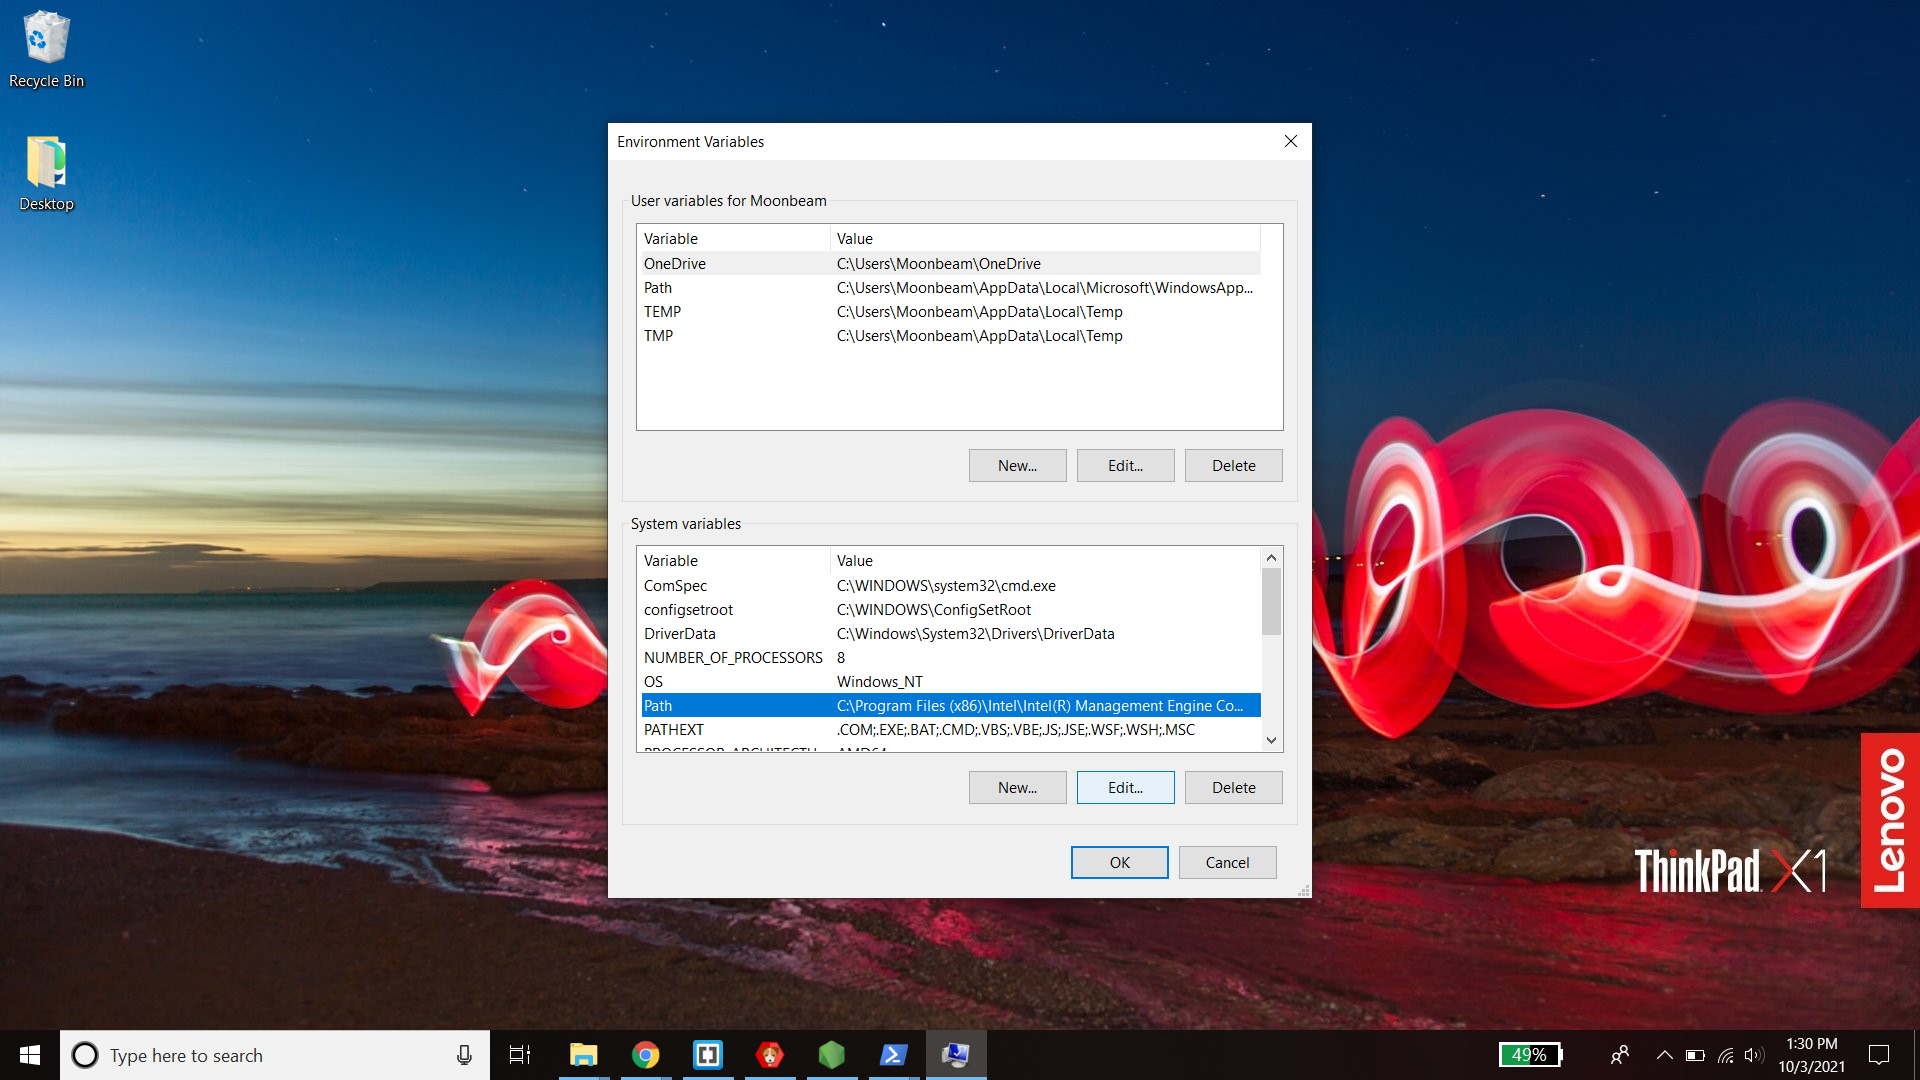
- Click "New" at the top right and and paste the location to the "bin" folder where you installed openssl. For me, the default location was "C:\Program Files\OpenSSL-Win64\bin"

Click ok to close the windows.
Step 2: Install certbot for windows
Download and run the windows installer for certbot.
Step 3: Verify ownership of your domain
- Type "powershell" in your windows task bar then right click "Windows Powershell" and run as administrator
- To start the domain verification process, enter the command below
Important**: You must match the malicious certificates domains. If their certificate was for "example.com" AND "*.example.com". You must do both. If it was just one, then do the one. If it was more subdomains, match all of them. You can see how they registered the certificate using crt.sh which is discussed in more detail in the next step
certbot certonly --manual --preferred-challenges=dns -d example.com -d *.example.com
- Once you have started the domain verification process using the command above, it will provide you with a TXT record to add to your DNS record.
- Follow the steps of your domain provider to add the TXT record.
- Once added, return to your Powershell window and press enter to continue verification.
- Upon successful verification, certbot will generate and download your certificates to the destination you installed certbot
Step 4: Download the malicious certificate files from crt.sh
- Go to crt.sh and search your domain. This will list all certificate files that have been issued for your domain.
- Click the crt.sh ID of the certificate in the returned list that you want to revoke
- Click "Download Certificate PEM" found in the very bottom of the left column of the table
Step 5: Convert .crt file to a .pem file
If the file downloaded is a .crt file, you will need to convert it to a .pem file.
- Open a windows powershell and CD into the directory where you downloaded the malicious certificate file
- Run the command below using the filename of the crt file you just downloaded
openssl x509 -in FILENAME.crt -out FILENAME.pem -outform PEM
- You should now have a .pem version of the certificate in the folder
Step 6: Revoke the certificate
Finally, the last step to revoke the certificate. Run the command below from the directory where the .pem file resides.
certbot revoke --cert-path FILENAME.pem --reason keycompromise
You will be asked if you want to delete any earlier or later versions of the same certificate. Enter yes (Y).
To verify if it was revoked, you can visit the certificates detail page on crt.sh where you downloaded the file from. In the "Revocation" row, to the right, there is a "Status" column. Click the "Check" link and it will update to let you know if the certificate has been revoked.
That's it. It can be pain trying to find all these steps across the web and even more of a pain to get them to work on your system. All of our set ups are different and is what causes most of the headaches we encounter when tackling these sorts of tasks. I hope these steps worked for your situation.